Whether you’re short on floor space (hello, indoor plant addiction) or simply want to make your workspace feel festive, this hanging Christmas tree is a super-cute option. You can be as minimal or maximal as you desire, and it won't take you more than an arvo to whip one up. Made exclusively by me for frankie magazine!
diy

DIY 3 WAYS WITH A WHITE T-SHIRT /
We've all got a white t-shirt or two tucked away in the wardrobe or at the back of a drawer. If they're not getting quite enough love as-is, it might be time to customise them into something more special.
Here are three super-easy ideas for snazzing up a plain shirt into something that suits your style to a tee, made exclusively by me for Spotlight!

DIY FLOWER DANGLES /
Flowers will never go out of fashion - and with fake flowers, you don't even have to worry about them losing their bloom!
This quirky and creative floral project will bring colour and cheer to a teen bedroom, lounge room or home office, or really anywhere that could do with a fun feature wall. It also looks pretty good as a selfie backdrop, in case you need another reason to look fab on social media.
Even better - this super-easy DIY requires virtually no special crafting skills to complete. If you can cut things and stick things and hang things up, then this is the project for you. Get creative, choose your favourite colours and blooms, and make a stunning statement piece of your own. Made exclusively for Spotlight!

DIY CHRISTMAS GIFT TAGS /
Sure, it’s simple to buy some generic cards or sticker labels from the post office. But if you want to knock the socks off the person on the receiving end of your gift, make it even more special by hand-drawing your own gift tags. If you're not the best artist in the world, kick your doodles up a notch with some snazzy markers (like the colour-blending pens we've used below). Original, cute and super-easy to do, made exclusively by me for frankie magazine!

DIY KEYRING HOLDER /
Gone are the days of mindlessly tossing aside your keys as you enter the front door (or worse yet, losing them in the depths of your bag). Take special care of your keys and display them proudly on your wall with this cute and simple DIY, made exclusively for frankie magazine!

DIY TRAVEL NECK PILLOW /
So you’ve booked yourself a ticket out of this place, huh? Good for you! I’m sure you’ve made a list of things you need to arrange before you travel and essentials you need to pack. One thing you may not have thought of is a neck pillow for that long flight/drive/cruise/what-have-you. But before you resign yourself to picking up a cheap polyester squishy thing from the convenience store, why not spend a bit of time making your own unique travel companion? Plus, you can finally put those scraps of material that have been building up in the corner of your room to good use. Made exclusively for frankie magazine!

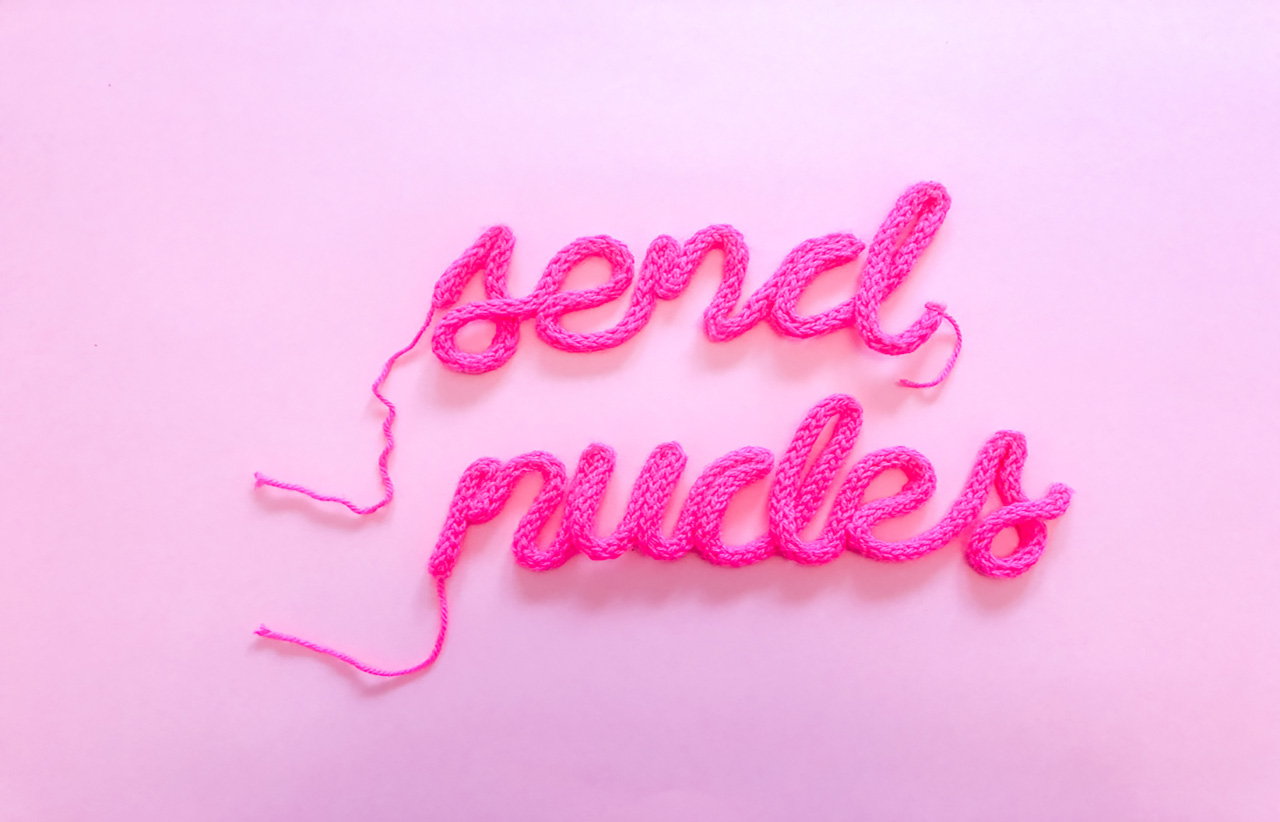
DIY YARN NEON SIGN /
Neon lights are fun. They are 80s, they are bright and they are the most obnoxious way to get the message out there. However, not all of us can afford to deck the walls in them and sometimes those little flamingos on a stand don’t quite cut it. So, with this DIY, you can neon up the entire house if you wish and it won’t affect your electricity bill. Nice.
MATERIALS:
- neon yarn
- french knitting spool and needle
- scissors
- soft wire
- wire cutters
- printer or black marker (optional)

INSTRUCTIONS:
1. Thread yarn through the top of the spool so it sticks out the bottom.

2. Grip the spool and use your little finger to hold down the tail while you loop the yarn clockwise around a peg.

3. Continue on to all four pegs.

4. Do another lap around all four pegs.

5. Use the needle to loop the bottom thread on a peg over the top thread - leaving just one thread behind. Do this for all four pegs. Pull on the tail.

6. Carry on with this until you have at least 2.5 metres all up of stitching (maybe more if you’re especially adventurous?)

7. To cast off, lift one stitch off it’s peg and carry it over to the next one. Lift the stitch below over it and repeat this until all stitches are removed. Cut the yarn and pull on it tight to hold it in place.

8. Now you get to be as creative as you like with your sign. I am bloody useless at drawing so I grabbed a nice cursive font and printed out one word per A4 page to use as my template. But, if you’re better at life than I am, then you can go XXL with your sign - just remember it needs to be a cursive font, please.

9. This next stage may cause some tantrums, I’m not going to lie to you. The best thing to do would be to make sure one end of the wire is softened (or you can trim it to a point) so that it’s easier to work with. You need to thread the wire through the inside of the ... thing … you’ve just made. Be kind to yourself during this process. Maybe go make a cup of tea.

10. When you’ve got it all threaded through, you can now lay it down on your template and shape the wire to create the text. This also requires patience. I’m sorry. When you’ve got it all how you want it, trim off the wire and cut the stitching. You should be able to tie a knot at the end which will hold it in place and guess WHAT. YOU’RE DONE.


DIY FLORAL SCRUNCHIE /
I feel like folks have been saying, “THE ’90s ARE BACK,” since 2005 and, if I’m being completely honest, I don’t think I’ve ever let go of that daggy decade. I may have grown out of the “bike shorts with oversized t-shirt and thick socks with white sneakers” phase, but I definitely haven’t outgrown my scrunchie phase. I’ve just given it a little update that’s quick and easy to do. Made exclusively for frankie magazine!

DIY FLORAL EASTER EGG TABLE DECORATION /
I love eggs. Eggy egg eggs. I want all the eggs! Easter is probably my favourite time of the year because of this. Not all eggs have to be edible, however, and you can make some pretty nifty-looking Easter decorations to adorn the dining table by following these easy steps, made exclusively for frankie magazine!

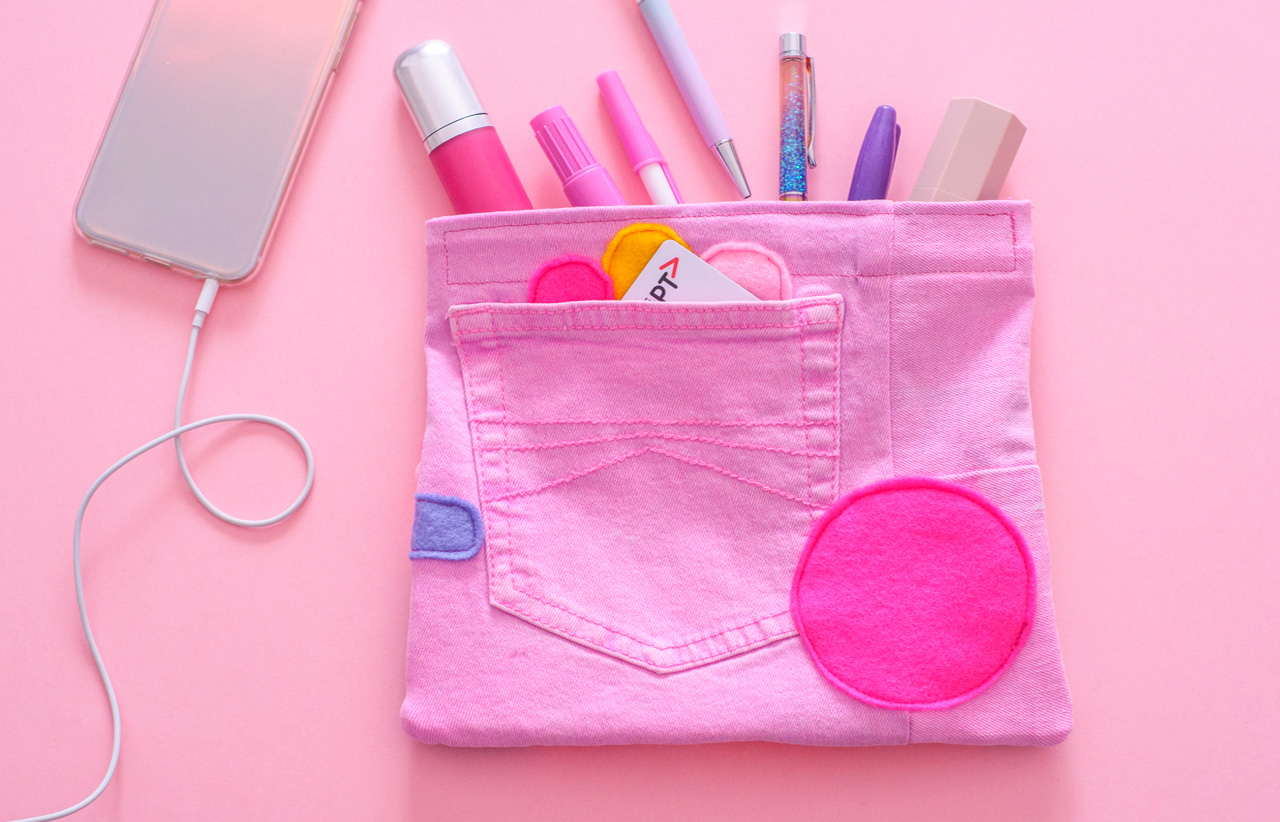
DIY DENIM PENCIL CASE /
Whether you’re heading back to school or just need more storage space for your ever-expanding make-up collection, you’ll need a pencil case. Because – let’s not kid ourselves – we’ve all already managed to build up a nice stash of stationery (or make-up brushes). This quick and easy DIY will show you how to turn an old pair of jeans into something you can use every day, made exclusively for frankie magazine!
DIY OMBRE POM POM CHRISTMAS TREE /
I think it’s generally agreed across the board that a Christmas tree is a fairly fundamental part of the silly season. But a traditional tree isn’t always to everyone’s taste – and let’s not forget those who may not be fortunate enough to have space for that giant plastic tree on sale at Kmart. That’s where this fun ombre pom pom tree comes in. Aren’t you lucky we’re here to save Christmas! Made exclusively for frankie magazine!

DIY T-SHIRT YARN RUG /
I don’t know about you lot, but I feel like there are some pretty borezo rugs out there and this just does not tickle my fancy in the slightest. I think our floors (and feet) deserve much more, and what better way to brighten up your space than with your very own handmade rug, created exclusively for frankie magazine!

DIY RAINBOW TAPESTRY BOOKMARK /
Books are nice. Not losing your place in a book is also nice. Not losing your place in a book with a handmade tapestry bookmark? Talk about HECTIC NICENESS. Everyone who isn’t you, with their dog-eared pages, will be so jealous when they see how good you look marking your book, thanks to this simple tutorial, exclusively made by me for frankie magazine!
